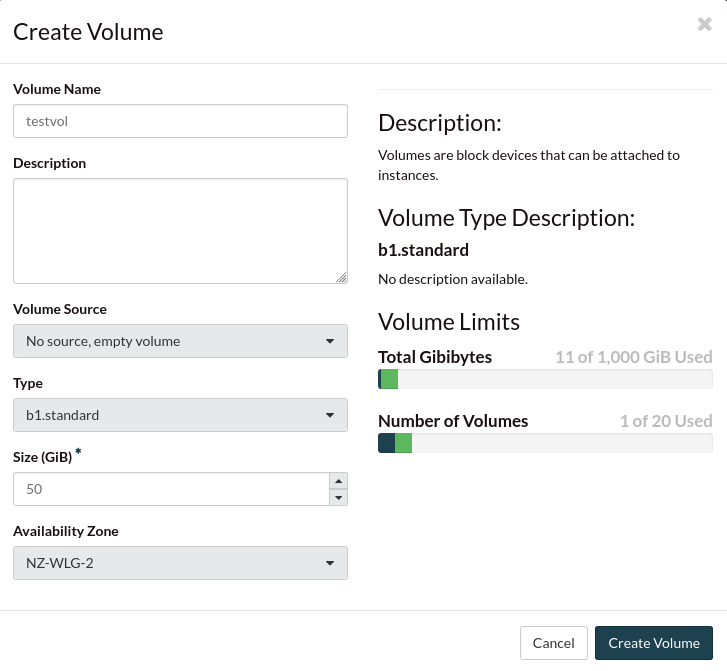
The following command will create a volume on your project:
$ openstack volume create --description 'database volume' --size 50 db-vol-01

+---------------------+--------------------------------------+
| Field               | Value                                |
+---------------------+--------------------------------------+
| attachments         | []                                   |
| availability_zone   | nz-por-1a                            |
| bootable            | false                                |
| consistencygroup_id | None                                 |
| created_at          | 2016-08-18T23:08:40.021641           |
| description         | database volume                      |
| encrypted           | False                                |
| id                  | 7e94a2f6-b4d2-47f1-83f7-xxxxxxxxxxxx |
| multiattach         | False                                |
| name                | db-vol-01                            |
| properties          |                                      |
| replication_status  | disabled                             |
| size                | 50                                   |
| snapshot_id         | None                                 |
| source_volid        | None                                 |
| status              | creating                             |
| type                | b1.standard                          |
| updated_at          | None                                 |
| user_id             | 53b94a52e9dcxxxxxxx0079a9a3d6434     |
+---------------------+--------------------------------------+
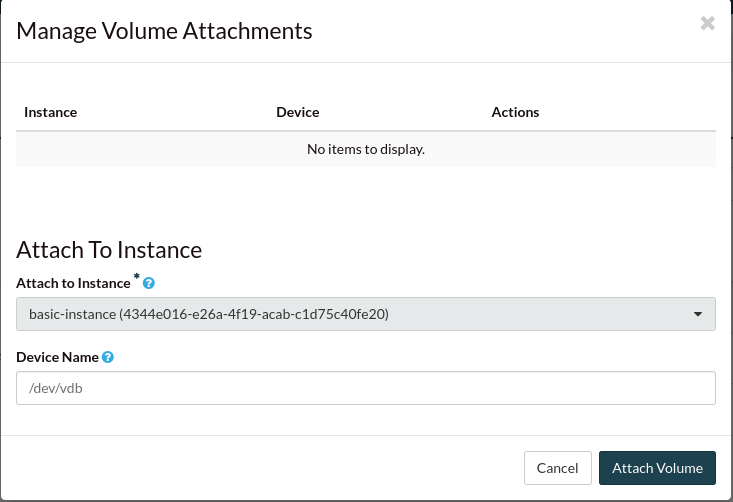
The next command will attach the previous volume to your instance. This
command assumes that your volume name is unique; If you have volumes
with duplicate names you will need to use the volume ID to attach the
correct volume to your compute instance.
attach-volume.sh
$ openstack server add volume <INSTANCE_NAME> <VOLUME_NAME>
The following assumes that you have already sourced an openRC file and
that you have downloaded and installed terraform. Terraform works by
reading a template file and creating resources on the cloud based off
of the defined structure in the template.
The template file we are using will create a volume and attach it to an
existing instance.
Save the following script and change the variables so that they fit
your project:
terraform-block-storage.tf
# Configure the OpenStack Provider
# This example relies on OpenStack environment variables
# If you wish to set these credentials manualy please consult
# https://www.terraform.io/docs/providers/openstack/index.html
provider "openstack" {
}

variable "public_network_id" {
  default = "<INSERT YOUR REGION NETWORK ID FROM THE BELOW LIST>"
}

# From: http://docs.catalystcloud.io/network.html?highlight=public%20network
#nz-por-1	849ab1e9-7ac5-4618-8801-xxxxxxxxxxxx
#nz_wlg_2	e0ba6b88-5360-492c-9c3d-xxxxxxxxxxxx
#nz-hlz-1	f10ad6de-a26d-4c29-8c64-xxxxxxxxxxxx

variable "volume_image_ID" {
  default = "<INSERT THE IMAGE ID FROM YOUR REGION>"
}

variable "instance_id" {
  default = "<INSERT INSTANCE ID>"
}

variable "volume_type" {
  default = "b1.standard"
}

#-----------------------------------------------------------------------------------------------

#Create an NVME storage volume
resource "openstack_blockstorage_volume_v2" "testvol" {
  size          = 50
  image_id      = "${var.volume_image_ID}"
  volume_type   = "${var.volume_type}"
}

#Explicitely attach the storage volume to the instance
resource "openstack_compute_volume_attach_v2" "va_1" {
  instance_id = "${var.instance_id}"
  volume_id   = "${openstack_blockstorage_volume_v2.testvol.id}"
}
The commands you will need to use are:
terraform-create.sh
$ terraform init

----------------------------------------------

$ terraform plan

----------------------------------------------

$ terraform apply
To remove all resources associated with this terraform plan, you can use the
following:
Heat is the native Openstack orchestration tool and functions by
reading a template and creating a stack on your project using
information contained within the template and from your environment
variables.
The following template will create a new volume and attach it to an
existing instance on your project:
heat-create-volume.yaml
#
# HOT template for creating a new volume and attaching it to an instance
#
heat_template_version: 2015-04-30

description: >
  HOT template for building a new volume and attaching it to an instance

parameter_groups:
- label: New-Volume
  description: New volume creation and attachment
  parameters:
  - volume
  - volume_size
  - instance

parameters:

  volume:
    type: string
    description: Name of the new volume
    default: heat-new-volume

  volume_size:
    type: number
    description: size of the volume you want to create
    default: 5
    constraints:
      - range: {min: 1, max: 100}
        description: the size of the volume is between 1 - 100GB

  instance:
    type: string
    description: ID of the instance you want the volume to be attached to
    default: <INSERT-ID-HERE>


resources:
  cinder_volume:
    type: OS::Cinder::Volume
    properties:
      size: { get_param: volume_size }

  volume_attachment:
    type: OS::Cinder::VolumeAttachment
    properties:
      volume_id: { get_resource: cinder_volume }
      instance_uuid: { get_param: instance }
      mountpoint: /dev/sdb
You will need to save this file as a .yaml and change some of the
parameters so that your volume will attach to the correct instance.
Once that is done, you will need to validate the template before it is
used to create your stack.
# Navigate to the directory that contains your yaml file and run the following:

$ openstack orchestration template validate -t heat-create-volume.yaml
If the template is outputted on your command line, then the template is
valid. If you receive an error, then you will need to fix the error
before you can use the template.
Once you have a valid template, you can run the following code to
create a new stack named new-volume-stack:
$ openstack stack create -t heat-create-volume.yaml new-volume-stack
The stack_status indicates that creation is in progress. Use the
event list command to check on the stack’s orchestration progress:
$ openstack stack event list new-volume-stack
Warning
If a stack has been orchestrated using Heat, it is generally a good idea to also
use Heat to delete that stack’s resources. Deleting components of a Heat
orchestrated stack manually, whether using the other command line tools or the
web interface, can result in resources or stacks being left in an inconsistent
state.
To delete the new-volume-stack you can use the following code:
$ openstack stack delete new-volume-stack
Are you sure you want to delete this stack(s) [y/N]? y